
Next.js 快取重新驗證排查紀錄:把部署後頁面 freshness 留成證據
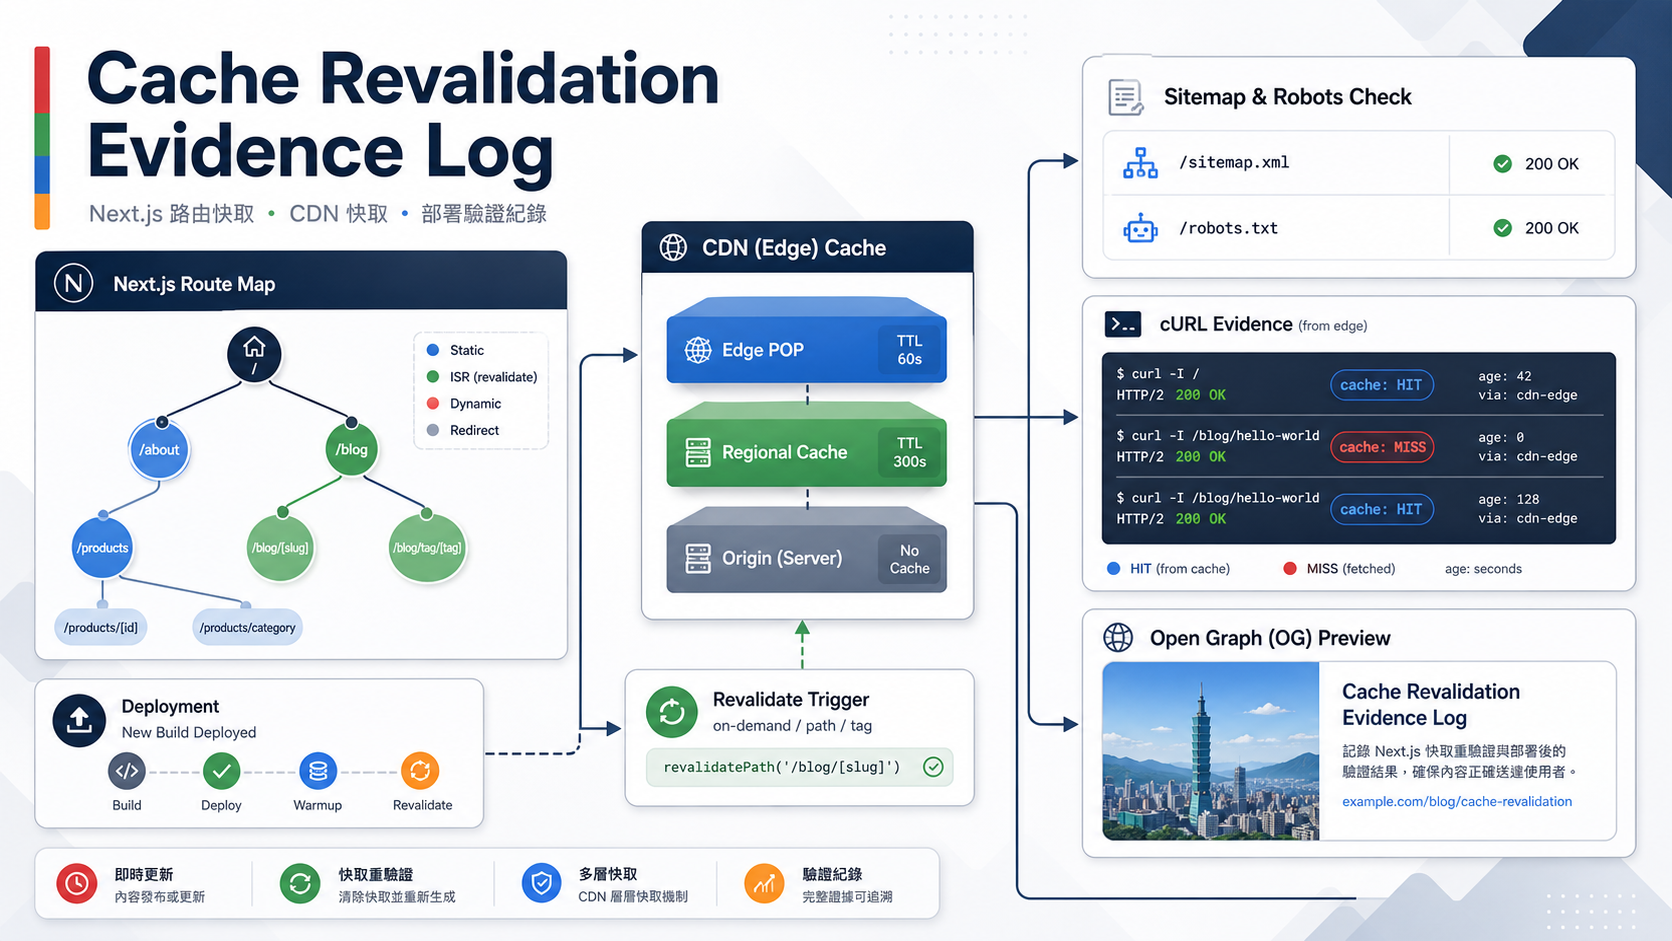
Next.js 內容站最容易讓人誤判的問題之一,是「部署成功」不等於「讀者看到的頁面已經更新」。GitHub commit 已經上去、Vercel build 也成功,但自訂網域可能仍然吃到舊的 HTML;文章頁可能已經 200,Blog 列表或 sitemap 卻還沒有新 slug;Open Graph 圖片也可能因快取而延遲更新。
我會把這類問題視為 freshness 事件,而不是只按一次重新部署。這篇整理一份適合內容站的排查紀錄:先確認程式與內容是否已在 repo,再分開檢查 route、列表、SEO 檔案、metadata 與 cache header,最後記錄是否需要重新驗證或等待邊緣快取刷新。
先分清楚:內容沒發布,還是部署快取沒刷新
排查第一步不是清 cache,而是確認新內容是否真的進入版本控制。若 Markdown 文章還停在 untracked 或 staged,production 當然不會更新。
git status --short

git log -1 --oneline

git ls-remote origin main
我會把觀察結果寫成這樣:
Publication evidence
- local file exists: content/blog/new-article.md
- frontmatter draft: false
- git status: clean after commit
- origin/main commit: matches local commit
- build source: same commit as origin/main
如果這一段還沒成立,就不要急著討論 CDN 或 ISR。先把內容 commit、push,並確認遠端分支指向正確 commit。
用 route 組合驗證 freshness
內容站不只是一個文章頁。一次有效的 freshness 檢查至少要包含首頁、Blog 列表、root-level 文章頁、分類頁、robots 與 sitemap。
for path in \
  / \
  /blog \
  /new-article-slug \
  /category/next-js \
  /robots.txt \
  /sitemap.xml

do
  curl -L -I "https://www.ucamc.com${path}"
done
狀態碼只是第一層。真正要看的還包括:
- 新文章頁是否 200。
/blog是否含有新文章標題或 slug。/sitemap.xml是否含有 root-level canonical URL。/robots.txt的 Sitemap 是否指向 production domain。- 分類頁是否能從新文章分類進入。
在 UCAMC 這類 root-level 文章架構中,文章 canonical URL 是 /{slug};/blog 只是列表頁。新文章不需要、也不應該依賴 /blog/{slug} 這種路徑。
把 cache header 與 HTML snippet 一起看
有些時候 curl -I 看到 200,但 HTML 仍然是舊內容;也可能 status 新了,列表還沒刷新。這時我會同時保存 header 與 body snippet,而不是只留一行「已上線」。
curl -L -I 'https://www.ucamc.com/blog'

curl -L -sS 'https://www.ucamc.com/blog' | grep 'new-article-slug'

curl -L -sS 'https://www.ucamc.com/sitemap.xml' | grep 'new-article-slug'
紀錄時可以拆成:
Freshness evidence
- article route: 200, contains article h1
- blog listing: 200, contains slug
- sitemap: 200, contains production canonical
- robots: 200, Sitemap points to https://www.ucamc.com/sitemap.xml
- cache observation: first probe stale, later probe fresh
如果 cache header 顯示 HIT,但頁面內容仍舊,就把它當成快取 freshness 問題,而不是立刻改程式碼。
檢查 metadata 與 OG 圖片,不只檢查頁面文字
文章頁更新後,SEO 與社群分享也要一起驗證。尤其是 cover image 或 og:image 變更時,build 成功不代表圖片 URL 可讀。
curl -L -I 'https://www.ucamc.com/images/blog/article-cover.png'

curl -L -sS 'https://www.ucamc.com/new-article-slug' | grep 'og:image'

curl -L -sS 'https://www.ucamc.com/new-article-slug' | grep 'canonical'
我會確認三件事:
- 圖片回應是 200,
content-type是 image。 - canonical 指向 production root-level URL。
og:image指向與文章主題相符的 cover,而不是舊文章或泛用圖。
這樣可以避免「頁面看得到文字,但社群分享圖仍舊」的半套上線。
重新驗證前先保留觀察紀錄
若確認 origin/main 已正確、local production 也正常,但 production domain 還是舊內容,才進入重新驗證或 redeploy 判斷。不要在沒有證據時亂改 slug、刪 .next 或重寫 routing。
Revalidation decision record
- local production route: OK
- origin/main: updated
- Vercel preview domain: fresh / stale
- custom domain: fresh / stale
- sitemap: fresh / stale
- action: wait / redeploy / purge cache / inspect deployment hook
- rollback needed: no source rollback, deployment-layer issue only
這份紀錄的重點,是把「原始內容品質」和「部署快取層」分開。內容站長期經營時,這種分層紀錄比一次性的口頭判斷可靠很多。
Legacy redirect 也要用正確範圍驗證
舊 WordPress 文章常會有 ID-prefixed URL,例如 123-old-slug。這種 legacy URL 應該 301 到 root-level slug。但新文章不需要測 /blog/new-slug,因為那不是 UCAMC 的 canonical 路徑。
curl -I 'https://www.ucamc.com/123-new-article-slug'
驗證結果應該寫成:
Legacy redirect evidence
- requested path: /123-new-article-slug
- status: 301
- location: /new-article-slug
- note: /blog/{slug} is not part of new article policy
結語:freshness 是一條證據鏈
Next.js 內容站的部署問題,很少只靠一個 status code 就能判斷。比較可靠的做法,是把 repo、build、route、列表、sitemap、robots、metadata、圖片與 cache header 串成一條證據鏈。
當這條證據鏈完整時,團隊就能清楚知道:問題是文章還沒發布、build 沒吃到新 commit、Vercel preview 已更新但 custom domain 慢半拍,還是 OG 圖片或 sitemap 被快取。這也讓 UCAMC 這類長期內容站,在每日維護中可以更穩定地累積文章,而不是每次部署都重新猜一次。